پردازش تصویر این روزا علاقه مند های زیادی رو به خودش جلب کرده ، خصوصا اگه بشه که از این مبحث توی زندگی واقعی بهره برد .
قبل تر من یک پایان نامه در رابطه با پردازش تصویر و تصاویر ویدیویی نوشتم و اون رو به رایگان توی نت منتشر کردم . توی اون پایان نامه زبان مورد نظر زبان شیرین سی شارپ بود . اما آدما کم کم که تجربشون بالا میره می فهمند که برای اهداف خاص برنامه نویسی از چه زبان برنامه نویسی استفاده کنند .
پایتون یه شاهکار مهندسی هستش که توی پردازش تصاویر و کلا پردازش محاسباتی با قدرت هرچه تمام ظاهر شده و در عین حال سادگی خودشو از دست نداده.
توی این آموزش ما می خواهیم یکم در رابطه با سیستم تشخیص پلاک خودرو با کمک زبان پایتون صحبت کنیم .
ANPR چیست؟
انگلیسی زبان ها استاد خلاصه سازی کلمات و جملات هستند و اصولا برای هر چیزی یک کلمه خلاصه شده دارند .
در اینجا هم ANPR مخفف Automatic number plate recognition که ترجمش “تشخیص اتوماتیک شماره ی پاک” میشه . برای اطلاعات بیشتر می تونید به ویکی پدیا مراجعه کنید و اطلاعات دقیق تر رو اونجا بخونید .
حرف از خلاصه سازی و مخفف سازی جملات شد این نکته رو هم اشاره کنم که کلمه wc رو ما به عنوان دستشویی توی زبان انگلیسی بکار میبریم مخفف water closet هست که به عبارت قدیمی “دست به آب” خیلی خیلی نزدیک تر بوده . ترجمه wc میشه “گنجه/منبع آب” .این نکته برای سرگرمی بود .
روش تشخیص پلاک
می شه گفت که تعداد روش های شناسایی پلاک خیلی خیلی زیاده و هرکس اصولا بسته به هدفش یکی از این روش ها رو انتخاب میکنه .
پیشنهاد می کنم که حتما اون لینک ویکی پدیا رو بخونید تا حساب کار دستتون بیاد.
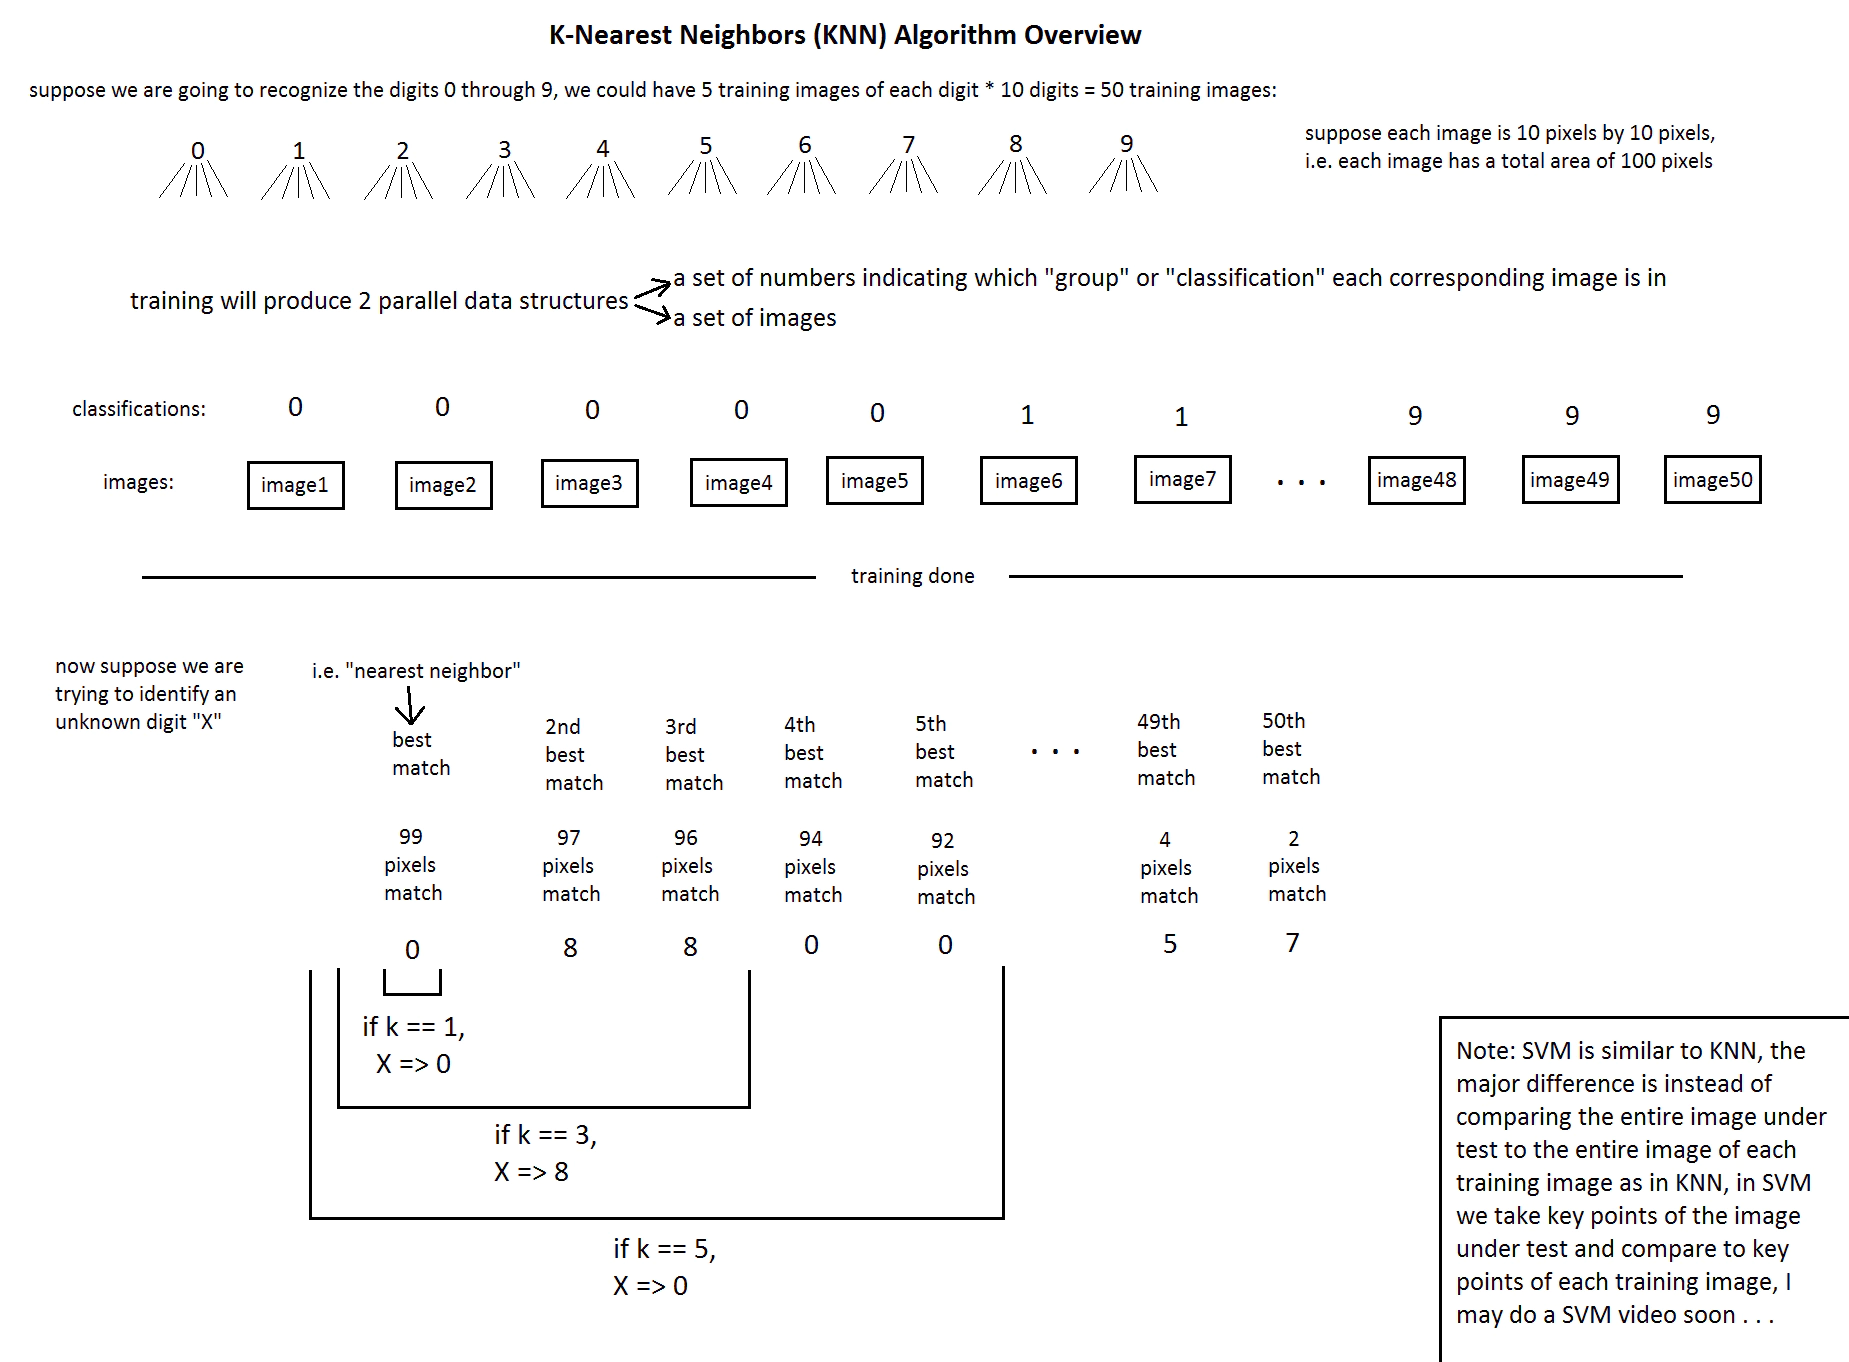
اما مرسوم ترین روش های پردازش تصویر ، classification یا طبقه بندی هستش .توی نت می تونید سرچ کنید و مطالب مربوط به اون ها رو دنبال کنید . اما من می خوام توی این آموزش یک مثال عملی و نسبتا ساده از سیستم تشخیص پلاک رو پیاده سازی کنم .برای همین وارد مباحث دانشگاهیش نمیشم . فقط برای کسایی که علاقه به جنبه علمیش هم دارند بگم که الگوریتم مورد استفاده ما KNN هستش .عکس زیر یکم علمی قضیه رو توضیح میده .(می تونید رو عکس کلیک راست کنید و توی یک تب جدید با کیفیت کامل عکس رو ببینید)
نحوه کارکرد برنامه :
این برنامه (مجموعه برنامه ) یک عکس پلاک رو به عنوان ورودی می گیره و کاراکتر و حروف روی پلاک رو به صورت تک تک تشخیص میده .سپس معادل کاراکتری هر حرف یا عدد رو توی برنامه جایگزین میکنه مثلا اگه عکس زیر رو بهش بدیم :
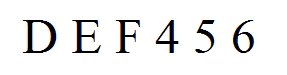
خروجی برنامه میشه : DEF456
این رو هم بگم که برنامه ابتدا “جدول عدد وحروف پایه” رو به عنوان یک اصل از ما میگیره و سپس کاراکتر های تشخیصی خودش رو با اون “جدول عدد وحروف پایه” مقایسه میکنه . توی پیاده سازی کامل تر توضیح میدم .
پیاده سازی برنامه :
کد زیر (زیر عکس) به منظور تولید فایل های مربوط به طبقه بندی classification ، یک عکس رو به عنوان ورودی از ما میگیره .مثلا ما عکس زیر رو می دیم به برنامه و اون دو تا فایل طبقه بندی شده که حاصل پردازش این عکس هست به ما میده .
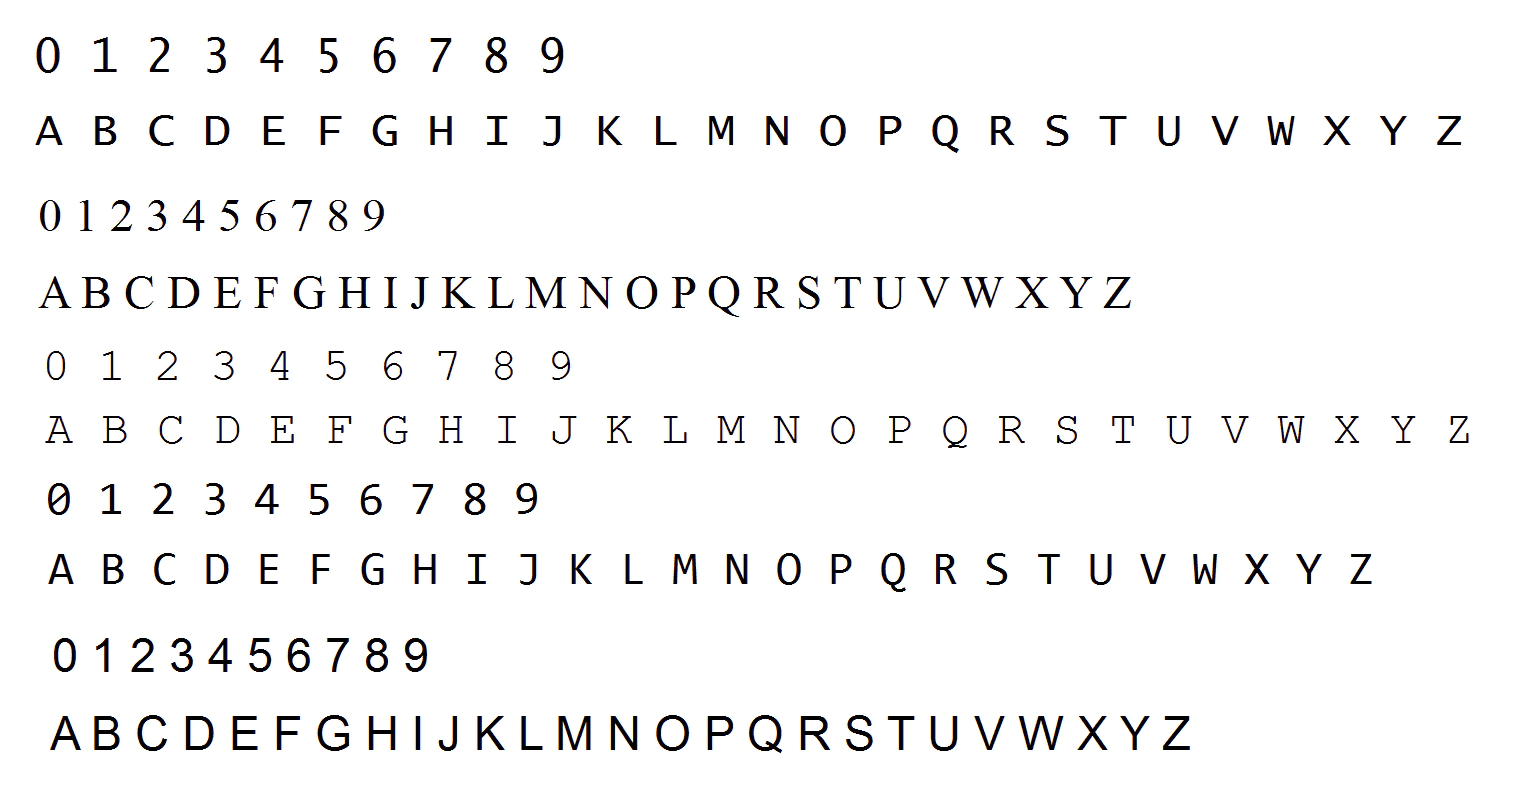
اون دوتا فایل تولیدی از عکس بالا به ترتیب به نام های classifications.txt و flattened_images.txt هستند .
# GenData.py

import sys
import numpy as np
import cv2
import os

# module level variables ##########################################################################
MIN_CONTOUR_AREA = 100

RESIZED_IMAGE_WIDTH = 20
RESIZED_IMAGE_HEIGHT = 30

###################################################################################################
def main():
    imgTrainingNumbers = cv2.imread("training_chars.png")            # read in training numbers image

    if imgTrainingNumbers is None:                          # if image was not read successfully
        print "error: image not read from file \n\n"        # print error message to std out
        os.system("pause")                                  # pause so user can see error message
        return                                              # and exit function (which exits program)
    # end if

    imgGray = cv2.cvtColor(imgTrainingNumbers, cv2.COLOR_BGR2GRAY)          # get grayscale image
    imgBlurred = cv2.GaussianBlur(imgGray, (5,5), 0)                        # blur

                                                        # filter image from grayscale to black and white
    imgThresh = cv2.adaptiveThreshold(imgBlurred,                           # input image
                                      255,                                  # make pixels that pass the threshold full white
                                      cv2.ADAPTIVE_THRESH_GAUSSIAN_C,       # use gaussian rather than mean, seems to give better results
                                      cv2.THRESH_BINARY_INV,                # invert so foreground will be white, background will be black
                                      11,                                   # size of a pixel neighborhood used to calculate threshold value
                                      2)                                    # constant subtracted from the mean or weighted mean

    cv2.imshow("imgThresh", imgThresh)      # show threshold image for reference

    imgThreshCopy = imgThresh.copy()        # make a copy of the thresh image, this in necessary b/c findContours modifies the image

    imgContours, npaContours, npaHierarchy = cv2.findContours(imgThreshCopy,        # input image, make sure to use a copy since the function will modify this image in the course of finding contours
                                                 cv2.RETR_EXTERNAL,                 # retrieve the outermost contours only
                                                 cv2.CHAIN_APPROX_SIMPLE)           # compress horizontal, vertical, and diagonal segments and leave only their end points

                                # declare empty numpy array, we will use this to write to file later
                                # zero rows, enough cols to hold all image data
    npaFlattenedImages =  np.empty((0, RESIZED_IMAGE_WIDTH * RESIZED_IMAGE_HEIGHT))

    intClassifications = []         # declare empty classifications list, this will be our list of how we are classifying our chars from user input, we will write to file at the end

                                    # possible chars we are interested in are digits 0 through 9, put these in list intValidChars
    intValidChars = [ord('0'), ord('1'), ord('2'), ord('3'), ord('4'), ord('5'), ord('6'), ord('7'), ord('8'), ord('9'),
                     ord('A'), ord('B'), ord('C'), ord('D'), ord('E'), ord('F'), ord('G'), ord('H'), ord('I'), ord('J'),
                     ord('K'), ord('L'), ord('M'), ord('N'), ord('O'), ord('P'), ord('Q'), ord('R'), ord('S'), ord('T'),
                     ord('U'), ord('V'), ord('W'), ord('X'), ord('Y'), ord('Z')]

    for npaContour in npaContours:                          # for each contour
        if cv2.contourArea(npaContour) > MIN_CONTOUR_AREA:          # if contour is big enough to consider
            [intX, intY, intW, intH] = cv2.boundingRect(npaContour)         # get and break out bounding rect

                                                # draw rectangle around each contour as we ask user for input
            cv2.rectangle(imgTrainingNumbers,           # draw rectangle on original training image
                          (intX, intY),                 # upper left corner
                          (intX+intW,intY+intH),        # lower right corner
                          (0, 0, 255),                  # red
                          2)                            # thickness

            imgROI = imgThresh[intY:intY+intH, intX:intX+intW]                                  # crop char out of threshold image
            imgROIResized = cv2.resize(imgROI, (RESIZED_IMAGE_WIDTH, RESIZED_IMAGE_HEIGHT))     # resize image, this will be more consistent for recognition and storage

            cv2.imshow("imgROI", imgROI)                    # show cropped out char for reference
            cv2.imshow("imgROIResized", imgROIResized)      # show resized image for reference
            cv2.imshow("training_numbers.png", imgTrainingNumbers)      # show training numbers image, this will now have red rectangles drawn on it

            intChar = cv2.waitKey(0)                     # get key press

            if intChar == 27:                   # if esc key was pressed
                sys.exit()                      # exit program
            elif intChar in intValidChars:      # else if the char is in the list of chars we are looking for . . .

                intClassifications.append(intChar)                                                # append classification char to integer list of chars (we will convert to float later before writing to file)

                npaFlattenedImage = imgROIResized.reshape((1, RESIZED_IMAGE_WIDTH * RESIZED_IMAGE_HEIGHT))  # flatten image to 1d numpy array so we can write to file later
                npaFlattenedImages = np.append(npaFlattenedImages, npaFlattenedImage, 0)                    # add current flattened impage numpy array to list of flattened image numpy arrays
            # end if
        # end if
    # end for

    fltClassifications = np.array(intClassifications, np.float32)                   # convert classifications list of ints to numpy array of floats

    npaClassifications = fltClassifications.reshape((fltClassifications.size, 1))   # flatten numpy array of floats to 1d so we can write to file later

    print "\n\ntraining complete !!\n"

    np.savetxt("classifications.txt", npaClassifications)           # write flattened images to file
    np.savetxt("flattened_images.txt", npaFlattenedImages)          #

    cv2.destroyAllWindows()             # remove windows from memory

    return

###################################################################################################
if __name__ == "__main__":
    main()
# end if
این برنامه جدول حروف استاندارد خودشو میسازه که هر بار از طریق این جدول حروف پلاک رو تشخیص بده . باید بگم که این برنامه بالا هر حرف از جدول رو که تشخیص داد ، شما باید کلمه متناظر اون رو روی کیبورد فشار بدید .مثلا اگه روی حرف Z داخل عکس قرار گرفت شما باید z رو روی کیبورد فشار بدید.
در نهایت وقتی کد اجراش تموم بشه سیستم تشخیص پلاک ما دیگه با عکس بالا کاری نداره و برای تشخیص به فایل های classifications.txt و flattened_images.txt رجوع میکنه .
اما برنامه تشخیص پلاک :
این کد پلاک رو از ما میگره و در نهایت به عنوان خروجی حروف و اعداد روی پلاک رو برای ما چاپ میکنه .
# TrainAndTest.py

import cv2
import numpy as np
import operator
import os

# module level variables ##########################################################################
MIN_CONTOUR_AREA = 100

RESIZED_IMAGE_WIDTH = 20
RESIZED_IMAGE_HEIGHT = 30

###################################################################################################
class ContourWithData():

    # member variables ############################################################################
    npaContour = None           # contour
    boundingRect = None         # bounding rect for contour
    intRectX = 0                # bounding rect top left corner x location
    intRectY = 0                # bounding rect top left corner y location
    intRectWidth = 0            # bounding rect width
    intRectHeight = 0           # bounding rect height
    fltArea = 0.0               # area of contour

    def calculateRectTopLeftPointAndWidthAndHeight(self):               # calculate bounding rect info
        [intX, intY, intWidth, intHeight] = self.boundingRect
        self.intRectX = intX
        self.intRectY = intY
        self.intRectWidth = intWidth
        self.intRectHeight = intHeight

    def checkIfContourIsValid(self):                            # this is oversimplified, for a production grade program
        if self.fltArea < MIN_CONTOUR_AREA: return False        # much better validity checking would be necessary
        return True

###################################################################################################
def main():
    allContoursWithData = []                # declare empty lists,
    validContoursWithData = []              # we will fill these shortly

    try:
        npaClassifications = np.loadtxt("classifications.txt", np.float32)                  # read in training classifications
    except:
        print "error, unable to open classifications.txt, exiting program\n"
        os.system("pause")
        return
    # end try

    try:
        npaFlattenedImages = np.loadtxt("flattened_images.txt", np.float32)                 # read in training images
    except:
        print "error, unable to open flattened_images.txt, exiting program\n"
        os.system("pause")
        return
    # end try

    npaClassifications = npaClassifications.reshape((npaClassifications.size, 1))       # reshape numpy array to 1d, necessary to pass to call to train

    kNearest = cv2.ml.KNearest_create()                   # instantiate KNN object

    kNearest.train(npaFlattenedImages, cv2.ml.ROW_SAMPLE, npaClassifications)

    imgTestingNumbers = cv2.imread("test1.png")          # read in testing numbers image

    if imgTestingNumbers is None:                           # if image was not read successfully
        print "error: image not read from file \n\n"        # print error message to std out
        os.system("pause")                                  # pause so user can see error message
        return                                              # and exit function (which exits program)
    # end if

    imgGray = cv2.cvtColor(imgTestingNumbers, cv2.COLOR_BGR2GRAY)       # get grayscale image
    imgBlurred = cv2.GaussianBlur(imgGray, (5,5), 0)                    # blur

                                                        # filter image from grayscale to black and white
    imgThresh = cv2.adaptiveThreshold(imgBlurred,                           # input image
                                      255,                                  # make pixels that pass the threshold full white
                                      cv2.ADAPTIVE_THRESH_GAUSSIAN_C,       # use gaussian rather than mean, seems to give better results
                                      cv2.THRESH_BINARY_INV,                # invert so foreground will be white, background will be black
                                      11,                                   # size of a pixel neighborhood used to calculate threshold value
                                      2)                                    # constant subtracted from the mean or weighted mean

    imgThreshCopy = imgThresh.copy()        # make a copy of the thresh image, this in necessary b/c findContours modifies the image

    imgContours, npaContours, npaHierarchy = cv2.findContours(imgThreshCopy,             # input image, make sure to use a copy since the function will modify this image in the course of finding contours
                                                 cv2.RETR_EXTERNAL,         # retrieve the outermost contours only
                                                 cv2.CHAIN_APPROX_SIMPLE)   # compress horizontal, vertical, and diagonal segments and leave only their end points

    for npaContour in npaContours:                             # for each contour
        contourWithData = ContourWithData()                                             # instantiate a contour with data object
        contourWithData.npaContour = npaContour                                         # assign contour to contour with data
        contourWithData.boundingRect = cv2.boundingRect(contourWithData.npaContour)     # get the bounding rect
        contourWithData.calculateRectTopLeftPointAndWidthAndHeight()                    # get bounding rect info
        contourWithData.fltArea = cv2.contourArea(contourWithData.npaContour)           # calculate the contour area
        allContoursWithData.append(contourWithData)                                     # add contour with data object to list of all contours with data
    # end for

    for contourWithData in allContoursWithData:                 # for all contours
        if contourWithData.checkIfContourIsValid():             # check if valid
            validContoursWithData.append(contourWithData)       # if so, append to valid contour list
        # end if
    # end for

    validContoursWithData.sort(key = operator.attrgetter("intRectX"))         # sort contours from left to right

    strFinalString = ""         # declare final string, this will have the final number sequence by the end of the program

    for contourWithData in validContoursWithData:            # for each contour
                                                # draw a green rect around the current char
        cv2.rectangle(imgTestingNumbers,                                        # draw rectangle on original testing image
                      (contourWithData.intRectX, contourWithData.intRectY),     # upper left corner
                      (contourWithData.intRectX + contourWithData.intRectWidth, contourWithData.intRectY + contourWithData.intRectHeight),      # lower right corner
                      (0, 255, 0),              # green
                      2)                        # thickness

        imgROI = imgThresh[contourWithData.intRectY : contourWithData.intRectY + contourWithData.intRectHeight,     # crop char out of threshold image
                           contourWithData.intRectX : contourWithData.intRectX + contourWithData.intRectWidth]

        imgROIResized = cv2.resize(imgROI, (RESIZED_IMAGE_WIDTH, RESIZED_IMAGE_HEIGHT))             # resize image, this will be more consistent for recognition and storage

        npaROIResized = imgROIResized.reshape((1, RESIZED_IMAGE_WIDTH * RESIZED_IMAGE_HEIGHT))      # flatten image into 1d numpy array

        npaROIResized = np.float32(npaROIResized)       # convert from 1d numpy array of ints to 1d numpy array of floats

        retval, npaResults, neigh_resp, dists = kNearest.findNearest(npaROIResized, k = 1)     # call KNN function find_nearest

        strCurrentChar = str(chr(int(npaResults[0][0])))                                             # get character from results

        strFinalString = strFinalString + strCurrentChar            # append current char to full string
    # end for

    print "\n" + strFinalString + "\n"                  # show the full string

    cv2.imshow("imgTestingNumbers", imgTestingNumbers)      # show input image with green boxes drawn around found digits
    cv2.waitKey(0)                                          # wait for user key press

    cv2.destroyAllWindows()             # remove windows from memory

    return

###################################################################################################
if __name__ == "__main__":
    main()
# end if
نکته: برای اجرای این برنامه ها شما نیاز دارید که کتابخانه opencv 3 به مجموعه کتابخانه های پایتون تون اضافه بشه.
برای نصب opencv ابتدا باید کل کتابخانه opencv رو دانلود کنید سپس توی فولدر های مربوط به کتابخانه هاش یه فایل هست به اسم cv2.pyd یا همچین چیزی .
سپس این فایل رو کپی کنید و ببیرید توی شاخه ای که پایتون رو نصب کردید .مثلا برای من میشه :
C:\Python27\Lib\site-packages
و فایل رو داخل این شاخه قرار بدید. همین .
دانلود کامل سورس کد ها و تصاویر به صورت یکجا در اینجا
درپایان یک ویدیو هم از تمام این چیز هایی که گفتم براتون گذاشتم .ولی زبانش انگلیسیه .
برای تشخیص پلاک های ایرانی با همین آموزش ، فقط کافیه کمی ابتکار بخرج بدید.
موفق باشید.


 mam_niki